Citrix announced the general availability of Workspace Cloud and Lifecycle Management back in August (here). In this article I want to share the procedure and learnings from my experience Deploying XenDesktop/XenApp on AWS with Citrix Lifecycle Management (CLM) using one of their pre-build blueprints, I have been working with CLM since May and I have had several meetings with Citrix Customer Experience Research group to provide feedback on the tool.
For this blog post, I will describe the different components required for the deployment and also the different terminology used on both AWS and CLM. The design below is a graphical representation of the environment

I will also like to share that I signed up for an AWS and Azure test account trying to take advantage of their free offering for “first time” users, but I have to share that due to the resources requirements for the blueprints none of the servers will fall on this free category so be ready to pay about $20 – $30 per week for a very simple environment; in my case I added create the environment a little bit more robust and was paying about $60 per week.
AWS Glossary
VPC – Amazon Virtual Private Cloud is basically a isolation container within your AWS account. You can have many VPCs with different network configurations and they won’t talk to each other. Official definition here
Instance – is the name AWS uses for virtual machines on your account. Official definition here
Elastic IP – It is an internet public IP that you can assign to any instance (VM) on your was account. Official definition here
Bastion Host – connection server that usually has the only public IP (Elastic IP) that allows you to access all the servers in your VPC
CLM Glossary
Blueprint – As an EUC architect I relate blueprints more to drawings or Visio diagrams but CLM defines a blueprint as the list of steps to create/deploy any type of environment. You can find all the related overview information here
Resource Location – It is the AWS or Azure or on-prem vCenter or any virtualization infrastructure you are going to use to host the environments.
Citrix NAT instance – this is VM that is automatically deployed by CLM to keep the communication with AWS or Azure. It is used during the deployment to accelerate the process. If you want to manually deploy one, you can do so by using the procedure in this link
CLM Services – These are a set of Windows services that run on every server deployed by CLM to be able to get monitoring and management information.
Deployment Profile – it is basically a saved answer file that a blueprint can read at deployment time so you don’t have to type the same thing over and over again.
Now that we have a better understanding of the environment components and terminology lets get started deploying XenDesktop/XenApp on AWS.
Preparing AWS accounts for CLM
Before creating the connection between CLM and AWS, make sure you have your IAM credentials handy, if you don’t have them or don’t know them the steps below will help you to get them.
When entering your AWS information in CLM, you will be required to enter your Secret Access Key; this information is retrievable from the IAM services on the AWS web page. By default AWS won’t create an IAM user so you will need to run through this process.

Click on Users, in the image below you can see my account doesn’t have any IAM Users so I wouldn’t be able to connect from CLM

Click on Create New Users

Enter a name for the user to be created and click on Create

A new user has been created and now you can download the credentials. Copy the Secret Access Key value so it can be used on the CLM configuration page.

Now that you have an account, it needs to belong to the right policies in AWS to provide the required access for CLM.
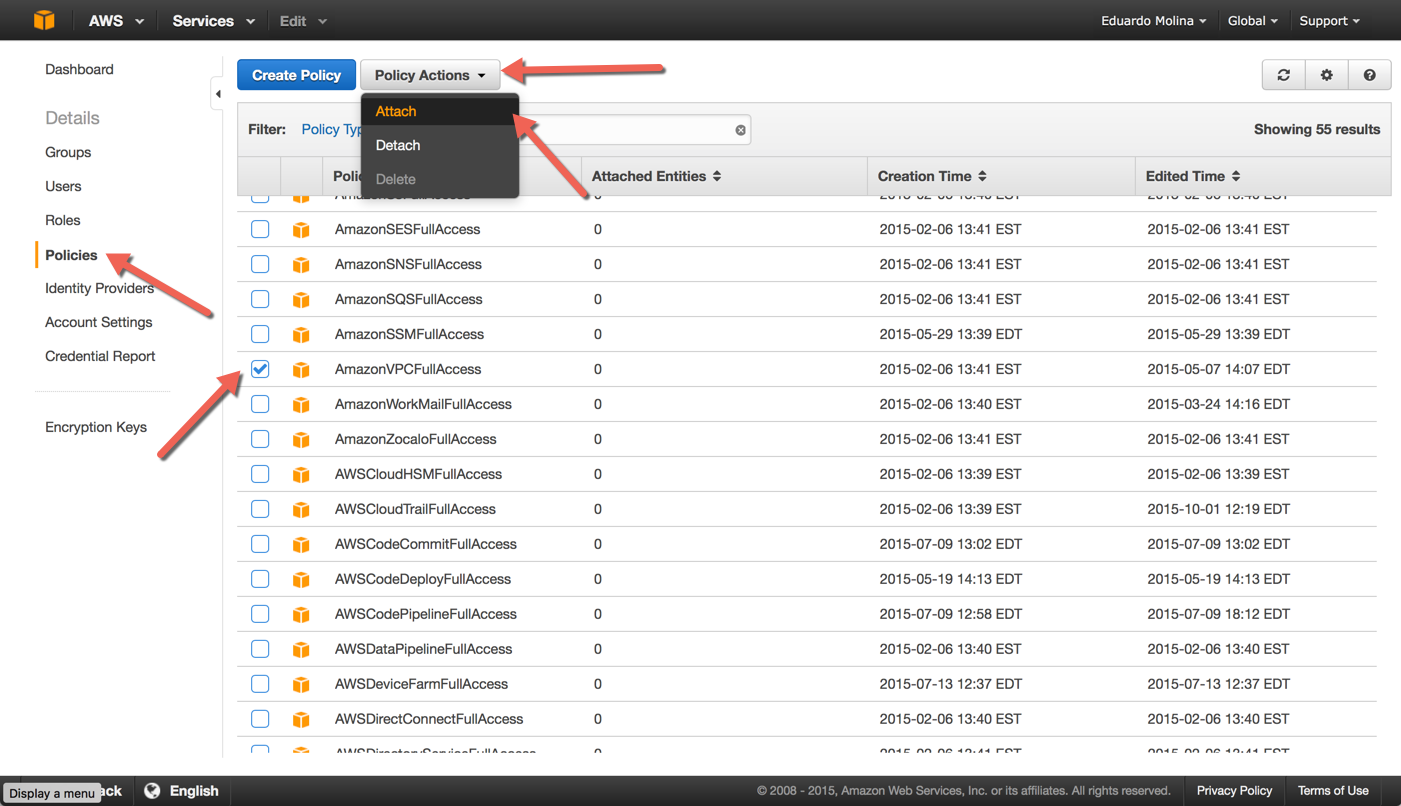
While you are still on the IAM module, click on Policies, look for the policy called AmazonEC2FullAccess and select it, then click on Policy Actions and then Attach

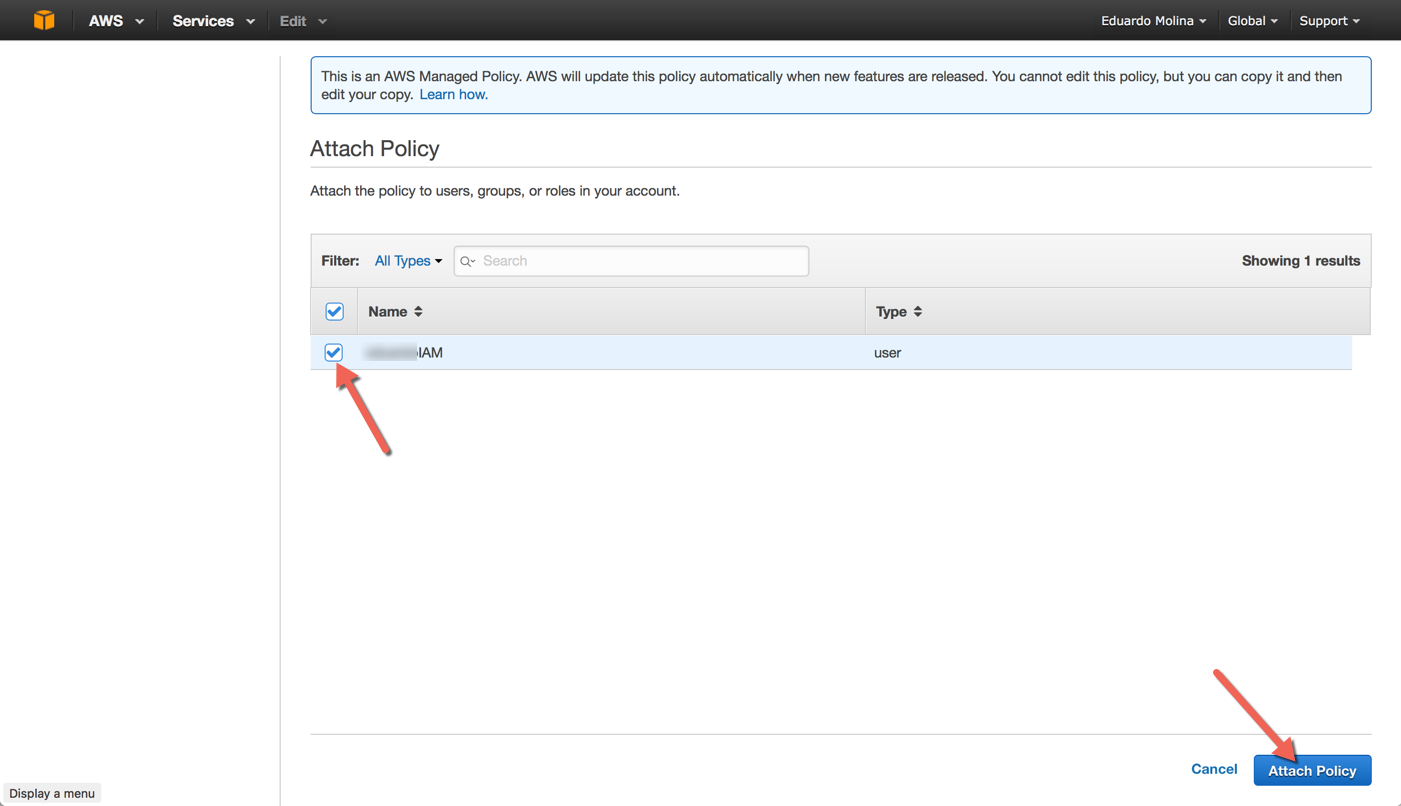
Select the IAM account that will receive the policy and then click on Attach Policy
Repeat the same process but select AmazonVPCFullAccess
You can verify the access policies were set correctly by selecting the account and clicking on Permissions

Citrix Lifecycle Management
Adding a Resource location
The First Step is add your AWS account to CLM. Logon on to you Citrix Workspace Cloud account and select Lifecycle Management.
Once on that page click on Resource & Settings, then click on Resource Locations and finally click on Add Resource Location

There are several different type of resources that can be added to the CLM and I will cover some of them like Azure and vSphere in a future post. For this post, we are going to click on Amazon Web Services (AWS)

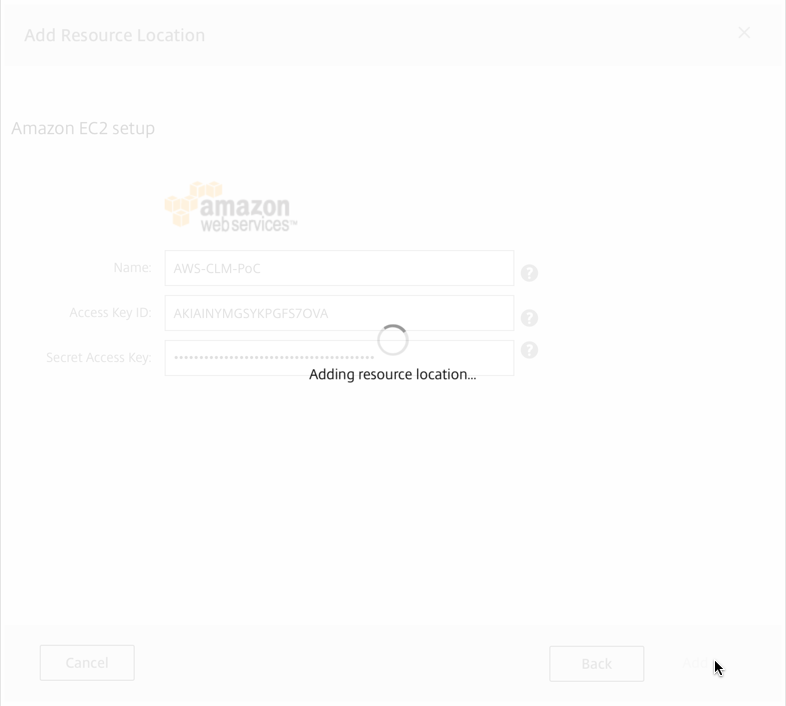
Enter your credentials for the AWS, then click on Add

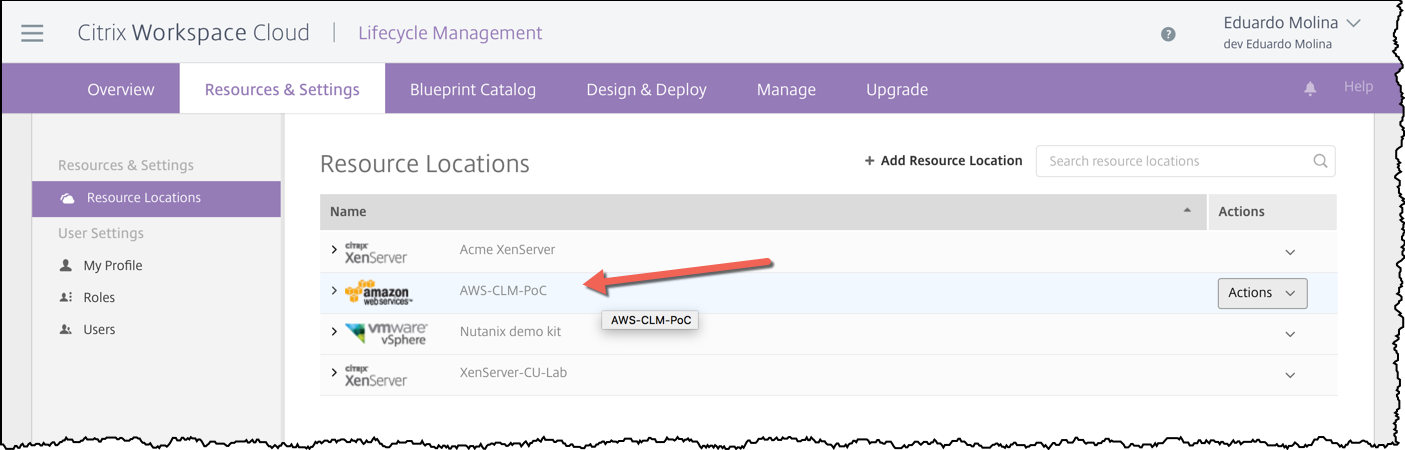
The resource location will be added

Deploying a blueprint
Now that a Resource Location has been added to CLM, it is time to add and deploy a blueprint. The first step to the deploy a blueprint is to add one.
Click on Blueprint Catalog, find the blueprint your want to deploy and click on the plus (+) sign.

Once the blueprint is part of your library click on Design & Deploy, look for the blueprint you recently added (or any other one), click on the Actions dropdown and click on Deploy

A page with an overview of the blueprint will be then presented to you, click on Start deployment setup

Type a name for this deployment and click on Next

You will now start filling out the requirements/parameters the blueprint needs to run. One of the requirements common among all blueprints is the Resource Location.

Review the Pre-Deployment check list and click on Continue

For the XenDesktop/XenApp PoC Blueprint, the number of domain controllers and delivery controllers are predefined and can’t be changed but you can decide how many VDA servers would be deployed
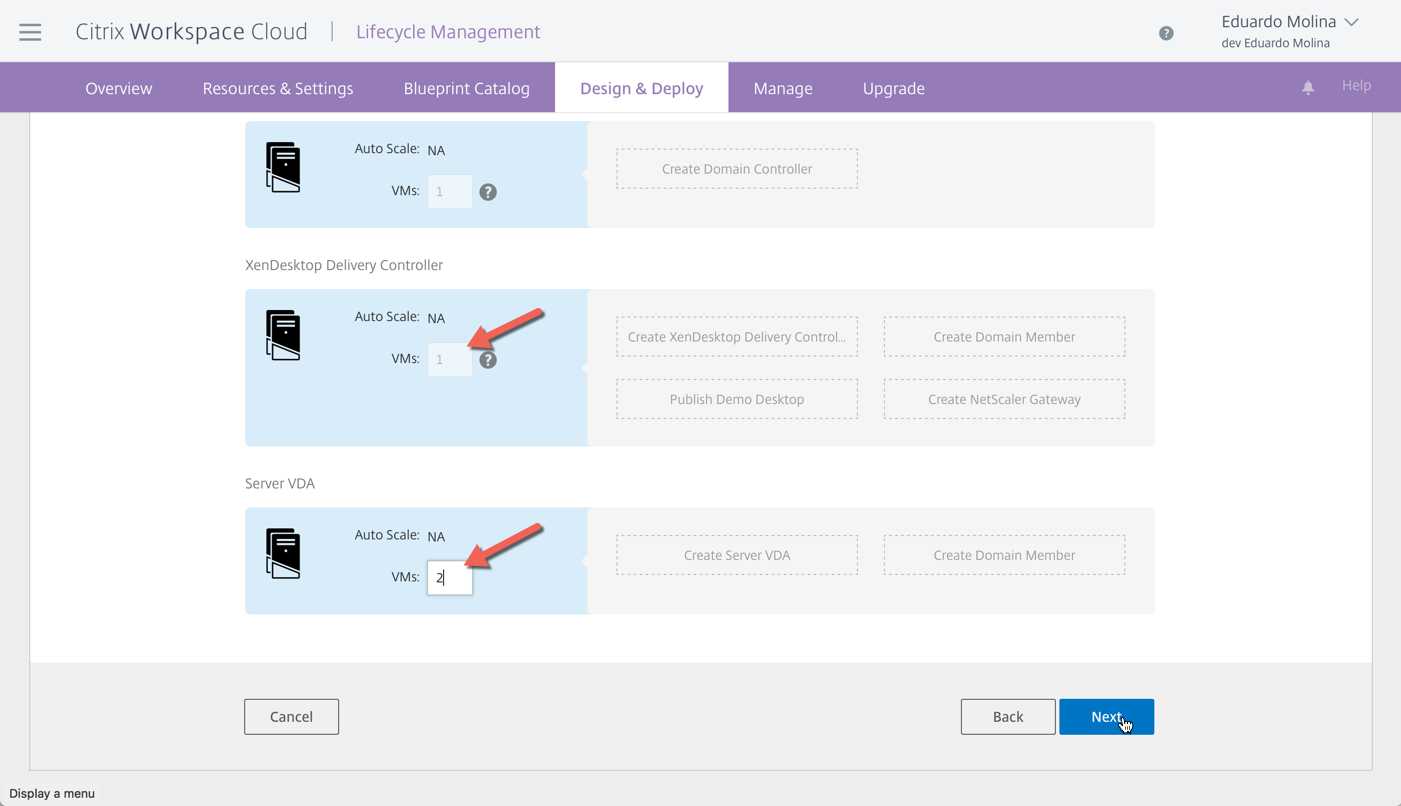
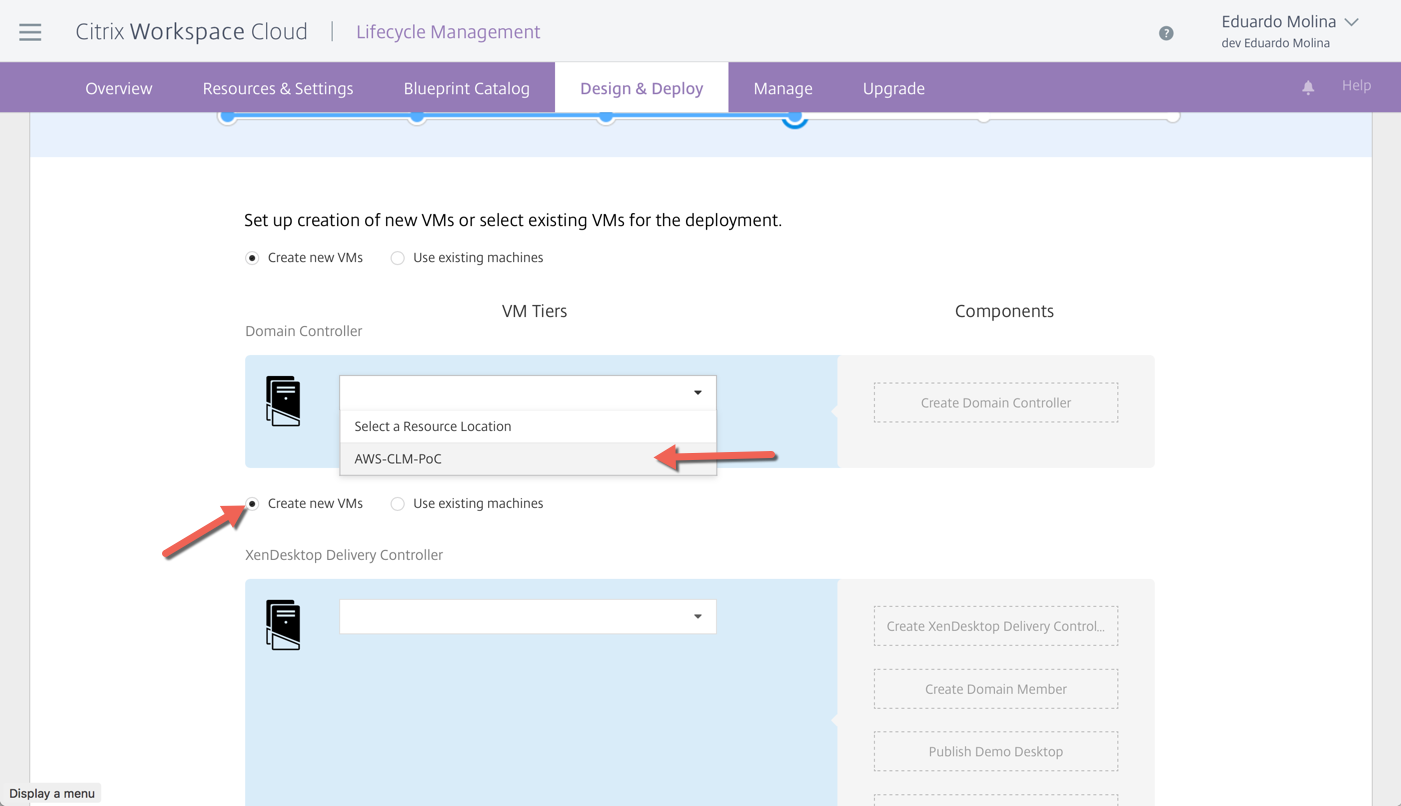
The next step is to define the Resource Location and whether we will be using existing servers or Create new VMs, for all the server components
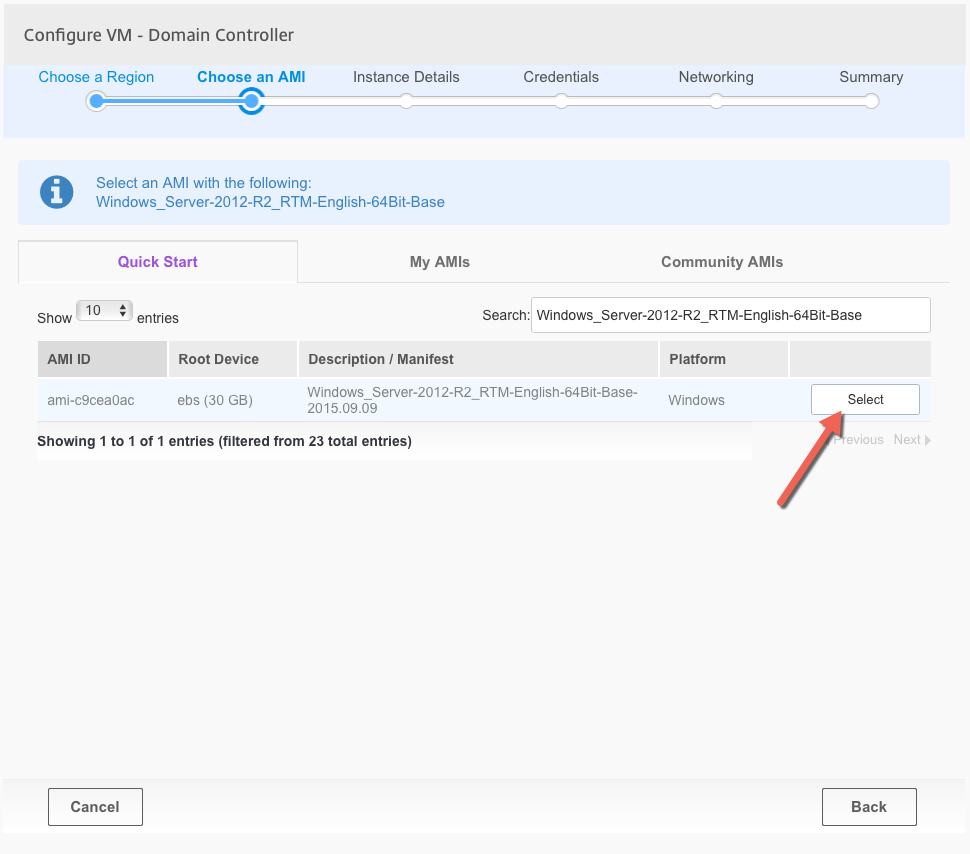
After selecting the Resource Location, CLM will automatically pull up the right AMI (image). Click on Select to continue with the deployment
Enter the instance (VM) details, server name, Network which is the same as a VPC and finally what subnet should be used. In this example we will be deploying to a brand new VPC by selecting Create VPC with public and private subnet

Fill out the necessary information for the VPC, which includes the overall IP CIDR block for which I usually use /16bit network size and then /24bit for the internal and external components of the VPC. A very important step is to make sure that the NAT instance gets the right information
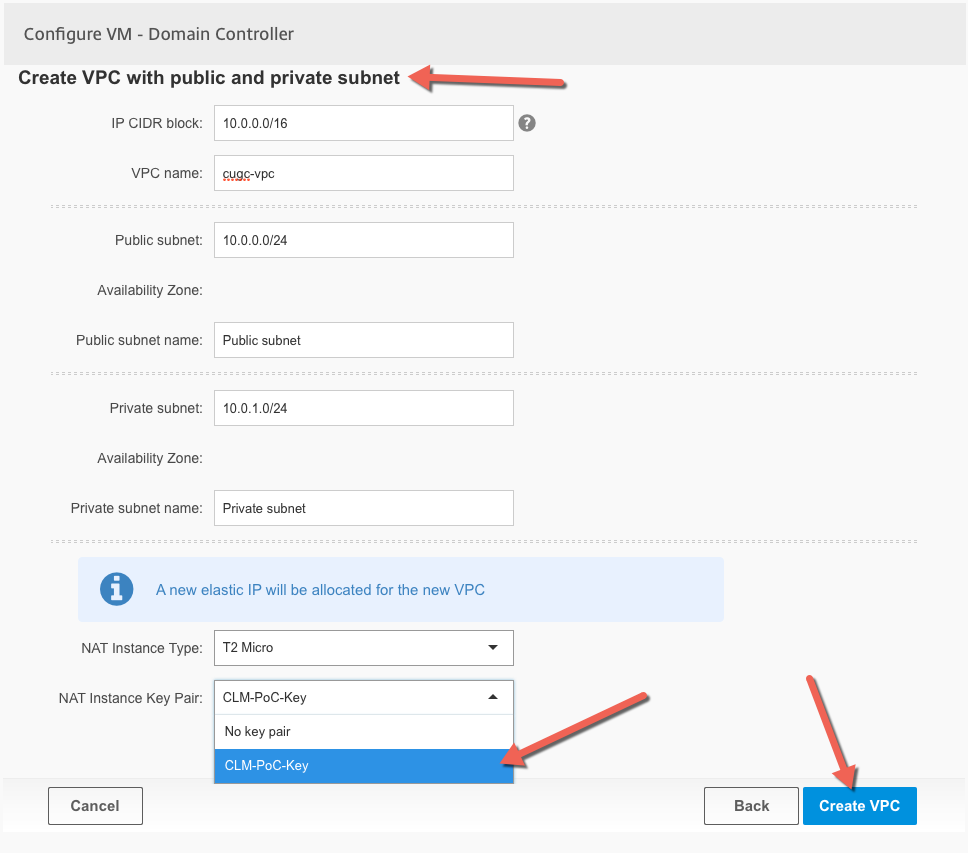
After clicking on Create VPC, CLM will contact AWS to provision the new VPC and its networks

Verify the configuration of the server and click Next
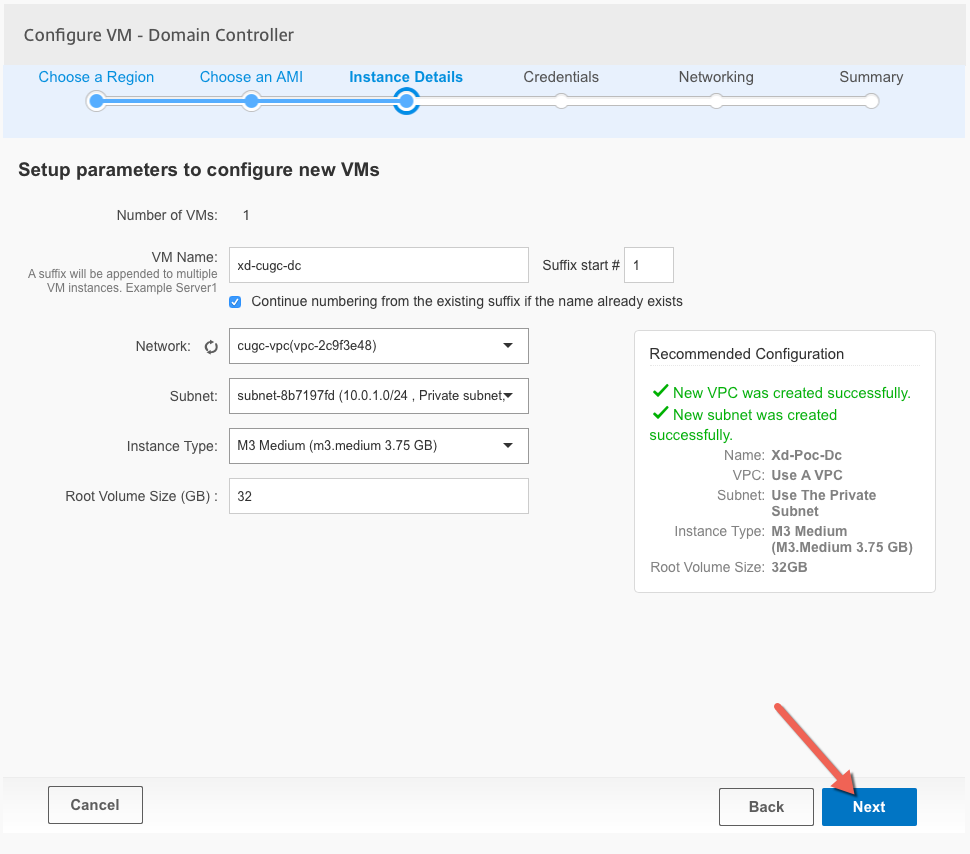
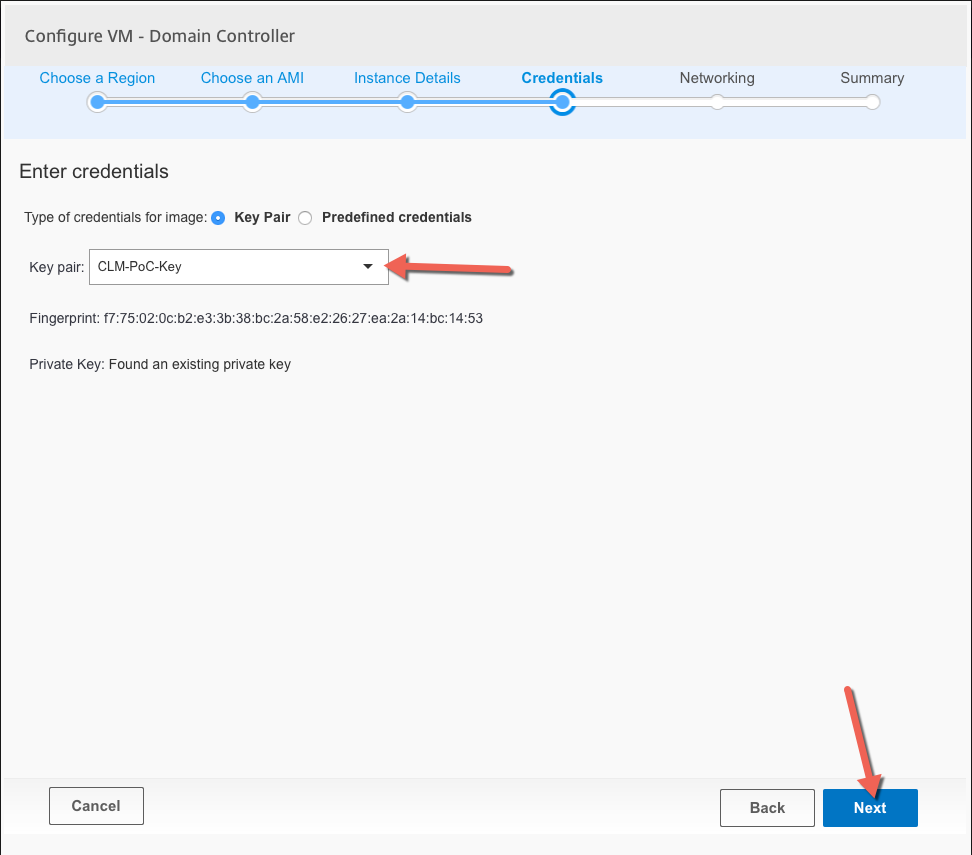
Select the credentials that will be used to decode the local administrator password, if none has been created it can be created during this step. Click ok Next
These will be internal servers so no need for Elastic IP

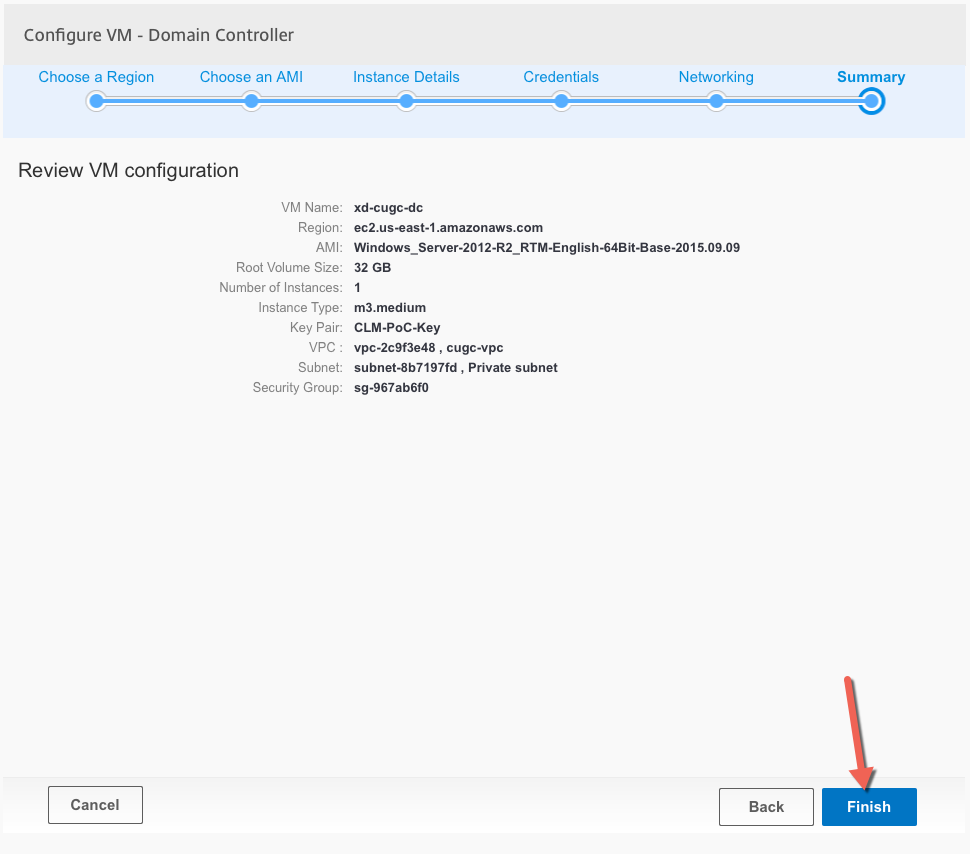
Review the first server configuration and click on Finish
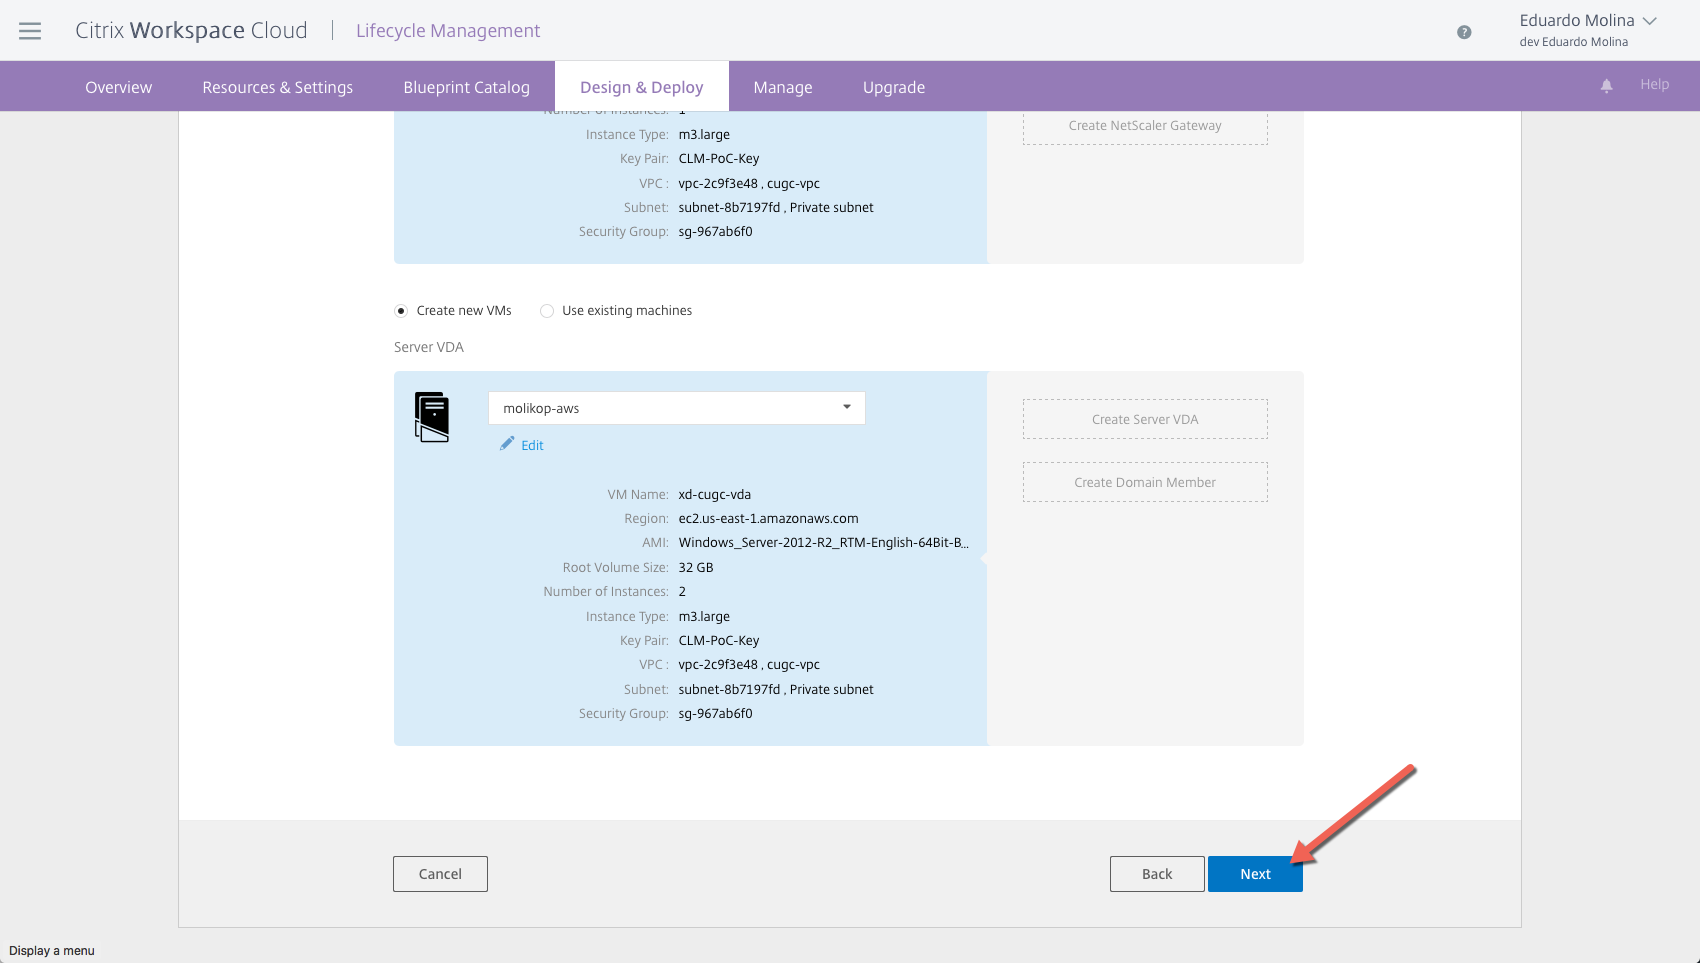
Repeat this process for all other servers on the blueprint. The VPC only needs to be created with the first server, the following servers just need to “consume” the newly created configuration.
Once all the server deployments configuration has been completed click on Next
More information will be needed depending on the blueprint. For this XenDesktop/XenApp demo environment we will need to define information such as the name of active directory domain, Administrator password, etc. By clicking on the question mark (?) a pretty good explanation about the field will be shown.
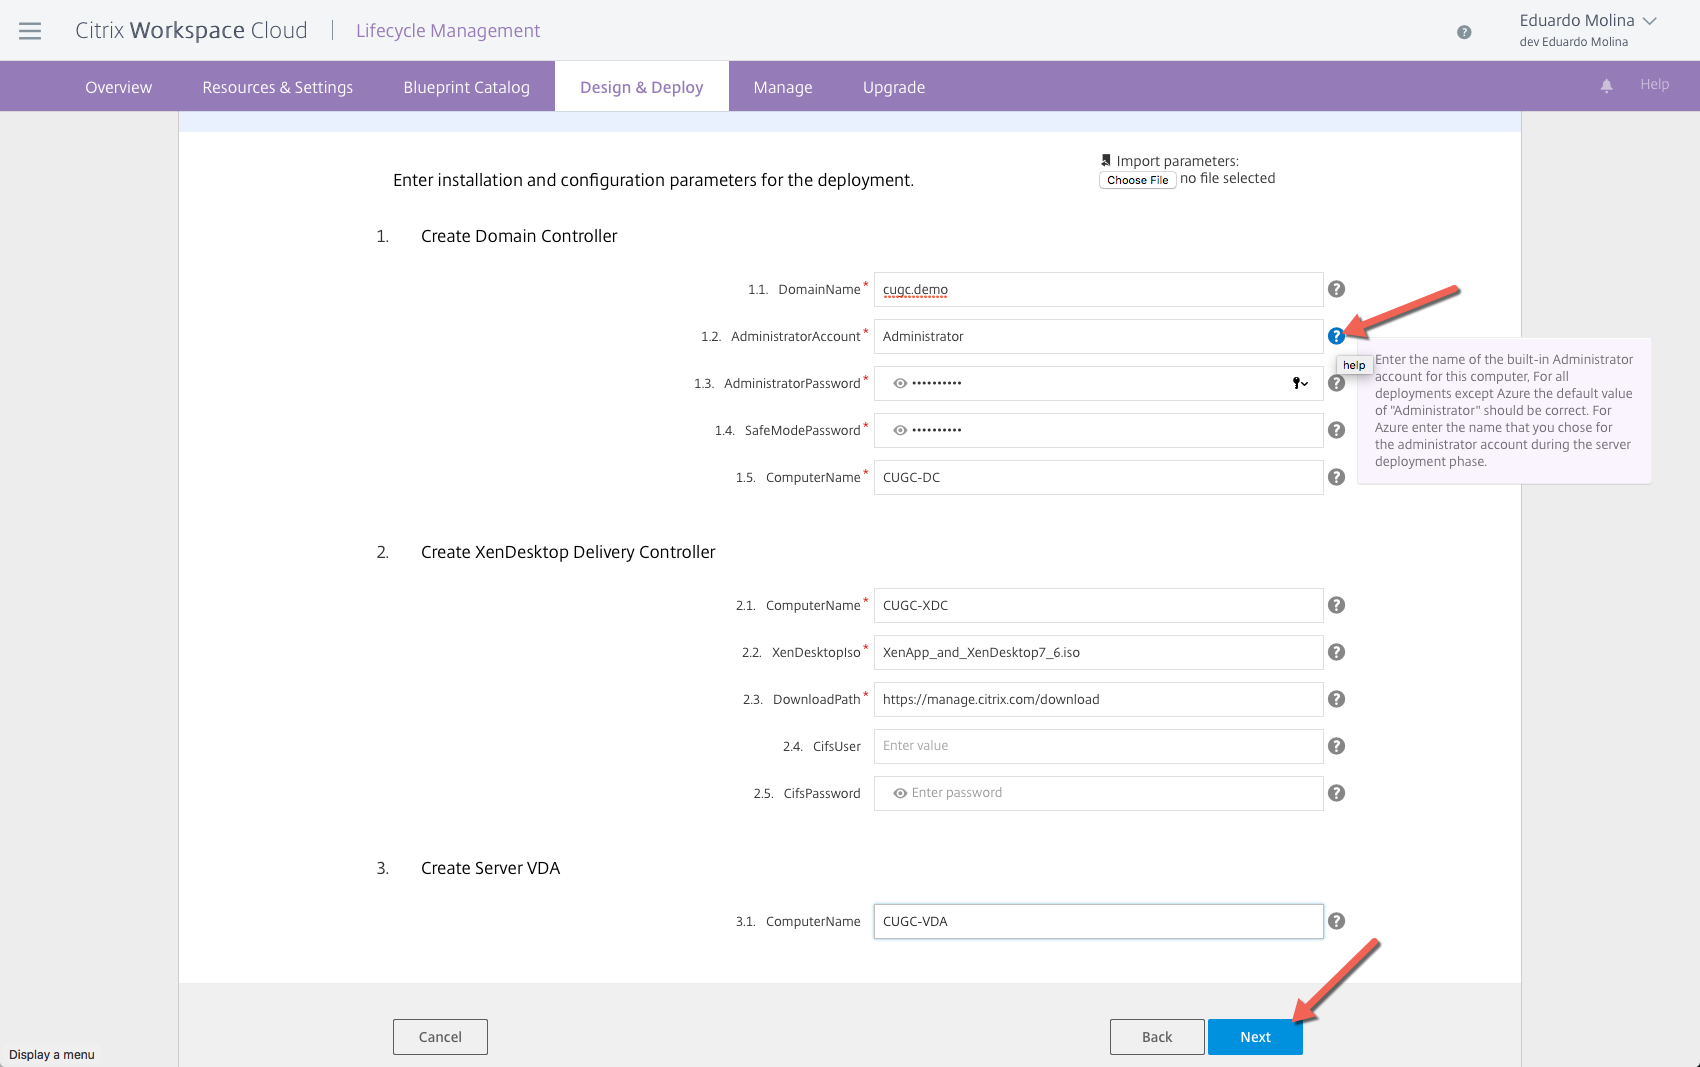
All the information that was manually entered for this blueprint can be saved at the end of the process by saving it to a deployment profile making it very simple to deploy the environment again.

Review the full deployment one more time and then click on Deploy

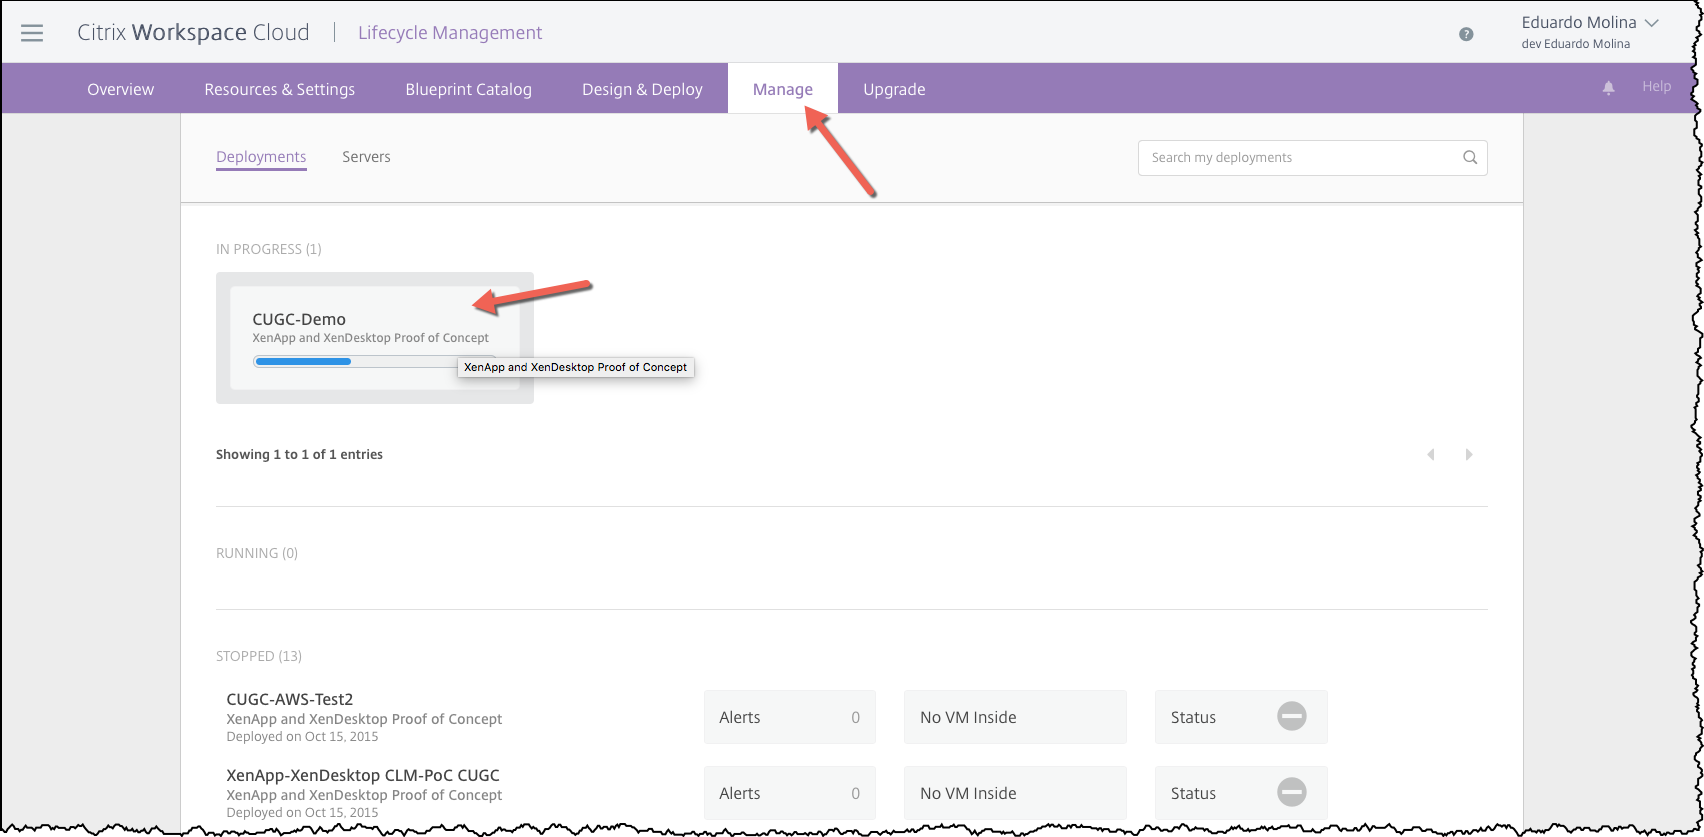
In order to track the deployment progress for this blueprint click on Manage and look for the In-Progress session.
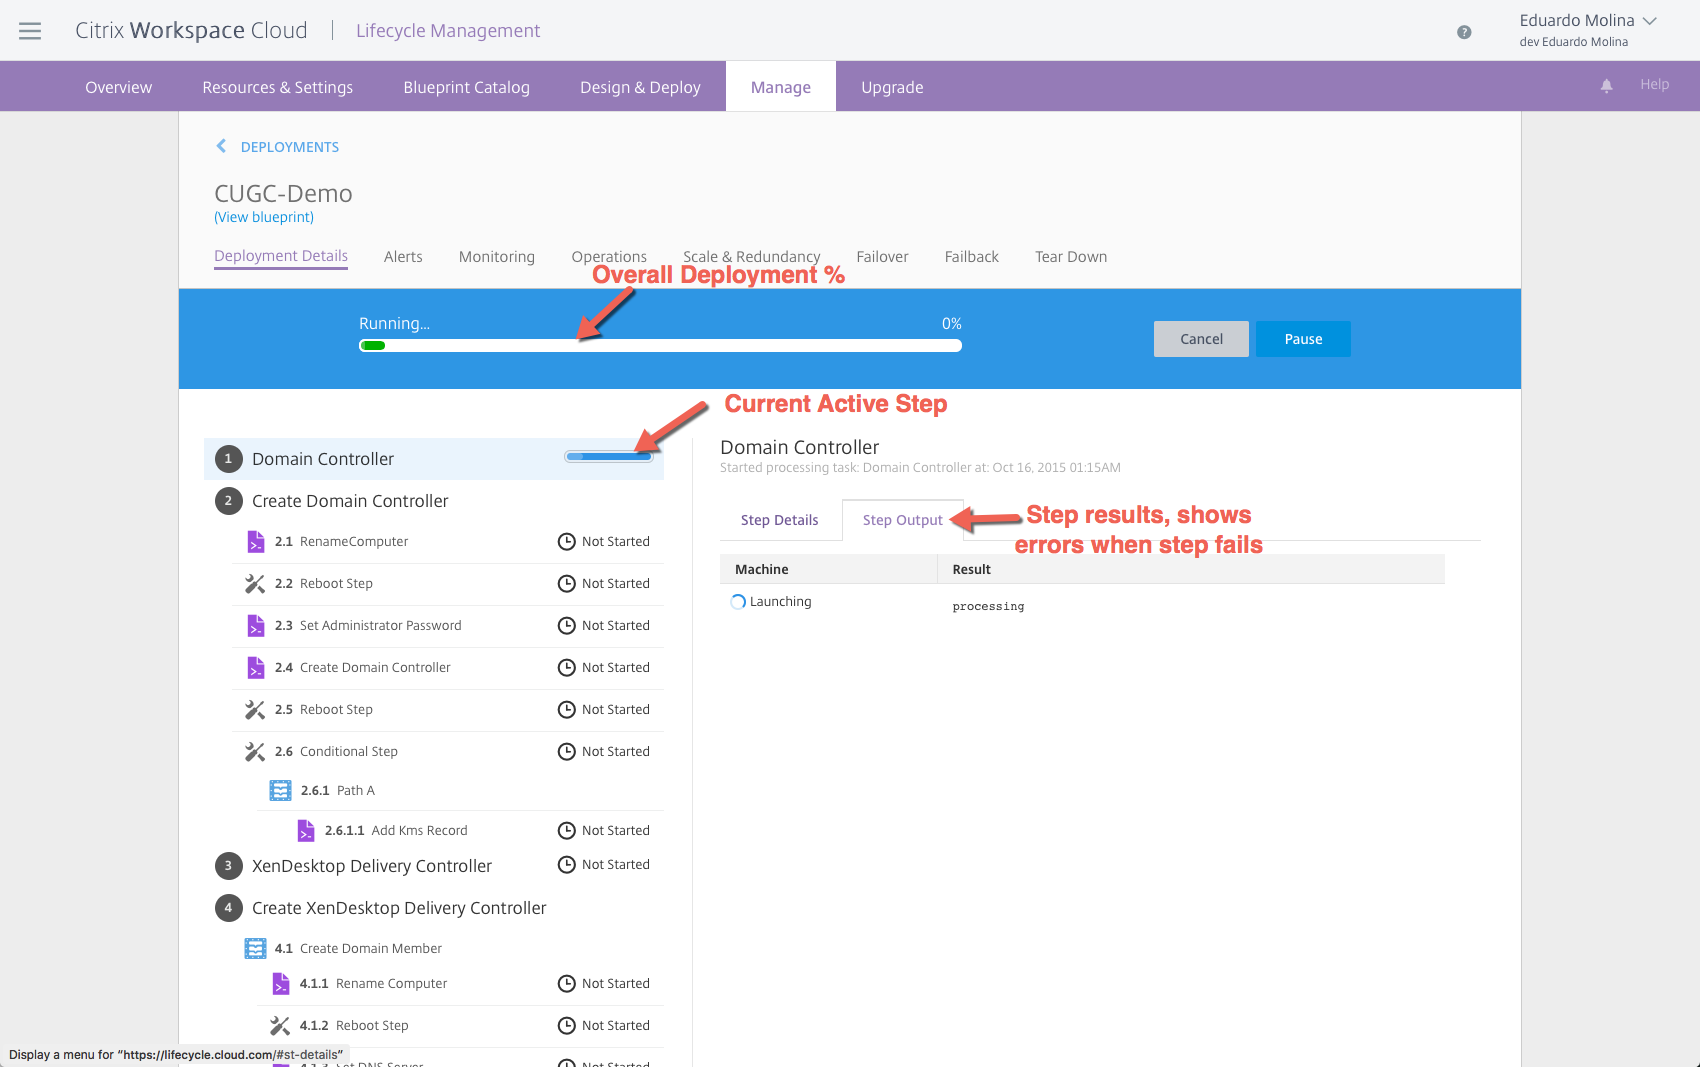
By double clicking on the “in-progress job” you will be able to see a lot the details about what is happening with the hypervisor.
Once the blueprint finishes deploying, we should be able to access the environment via a Bastion host. you can also configure the NetScaler to provide access to the internal servers via ICA.
Thank you very much for reading and please come back for the next couple deployments to “on-prem” and Azure resource locations.