Install and Configure Citrix Provisioning Services 7.1
The following instructions were created to help you to install and configure Citrix Provisioning Services 7.1 (PVS) on Windows 2012 R2. It should help you whether your are creating a PoC or production environment. For this installation we are assuming a SQL Server 2012 database is already installed and you have at least Dbcreator access role. This PVS environment will be provisioning XenApp 6.5, XenApp 7.5 and XenDesktop 7.5 workloads.
For more detail information on PVS, you can always go to Citrix PVS eDocs
The following step-by-step instructions should enabled you to have a PVS environment in no time. First mountthe ISO on the server, Windows 2012 has a great feature to mount ISO files, just right click the file click mount
Installation
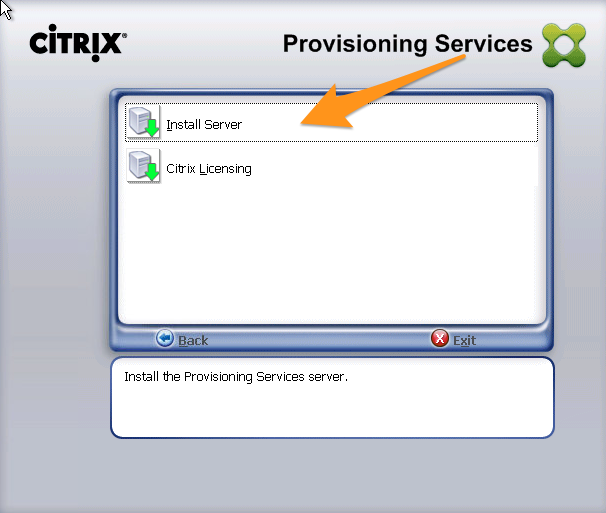
Select Server Installation

Click on Install Server
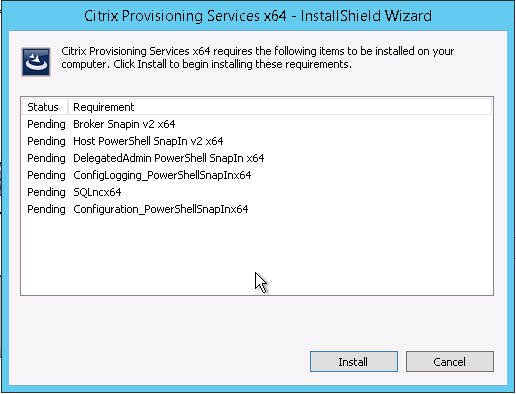
The installation software will check pre-requisites and install them for you. This is pretty nicely done by Citrix. My PVS server was a vanilla Windows 2012 R2 server with .Net 4.5 installed only. No additional features had been previously installed. Click on Install
The Welcome window will be presented, click on Next

Accept the licenses
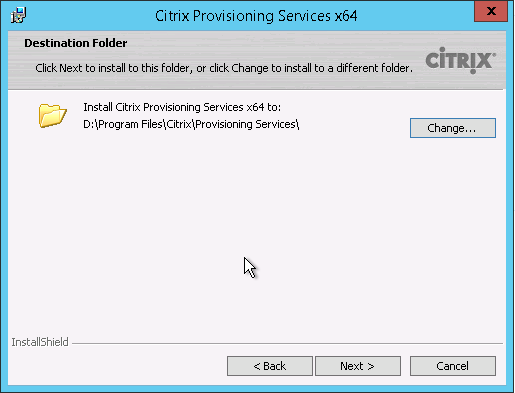
Select your installation folder, we are changing this to D:\ drive according to our standards. Click on Next after defining the installation folder
Review the summary and click on Install
Configuration
The configuration we are about to do is about DHCP, PXE boot, store locations for gold images, etc. I have a separate article about reverse engineering existing images (VHD) running older versions of the PVS agent.
Go back to the start menu or application menu (depending on your Windows server version); start Provisioning Services Configuration Wizard and start Click on Next
For this PoC the PVS server will be authorized as a DHCP but for production this should be running on the production DHCP server. Now when using network segmentation to separate management and user access from boot traffic, you might decide keeping DHCP running on the PVS server.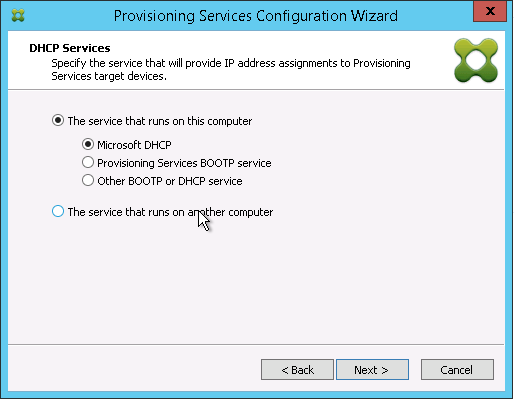
When configuring Microsoft DHCP for PXE boot you will need to add options 66 and 67 to the scope options for the TFTP file name and its location. If want to configure TFTP instead, you will need options 60 and 69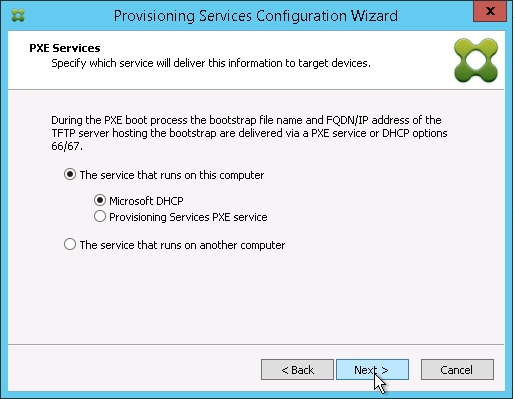
Now you need to enter the information for the database server where the PVS database will be created, if database mirroring is already configured, you can enter the information on this screen. Because this is our first PVS server there is no DB mirror configured yet. 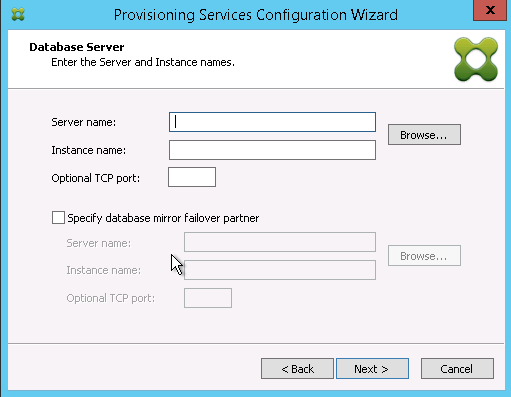
Since this is the first server you will need to enter a name for DB, for the Farm and the site as well as create the first collection.
A collection will be how you will group the images, if planning on only having one then you can leave the default name, in our case we changed to XenDesktop and later created a second collection called XenApp. We are also using AD groups for security.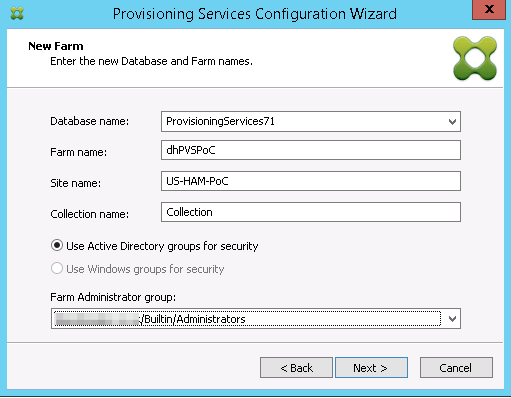
Create the first store. Store is where your gold images (VHD files) are going to be stored, you need to create one as part of the initial configuration
Enter the name of your licensing server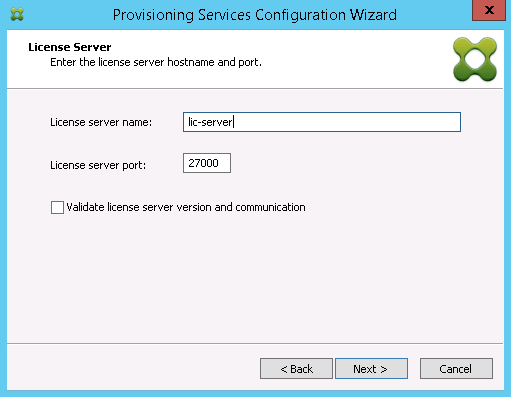
The streaming and soap services should run under an AD domain account that has access to the SQL server DB, This is important as you definitely want those server to read/write from the PVS database. In our case we are using the same account we created to run SQL Server as e.g. sqlpoc account, but you should create a separate service account and grant it access to SQL Server/Database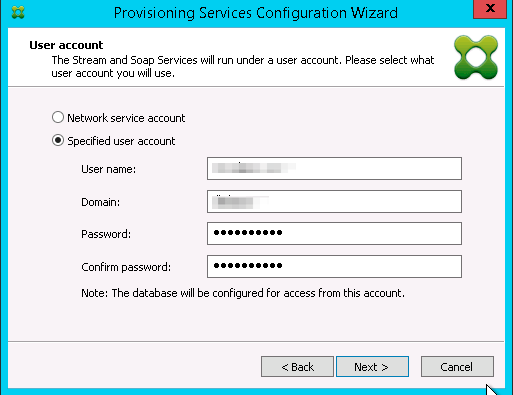
Use the default AD account reset interval, unless your domain administrator ahs changed this configuration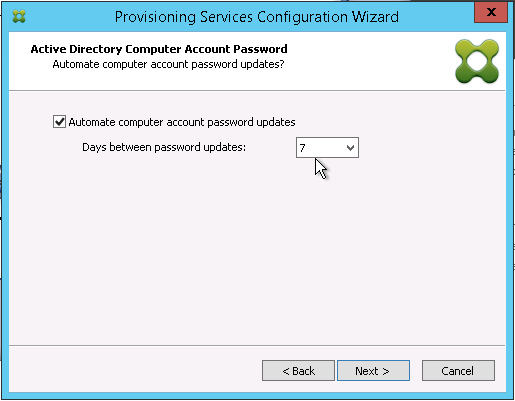
Initially for this PoC we are going to use a single 10Gb NIC but we could move to two NICs if/when network segmentation is needed. 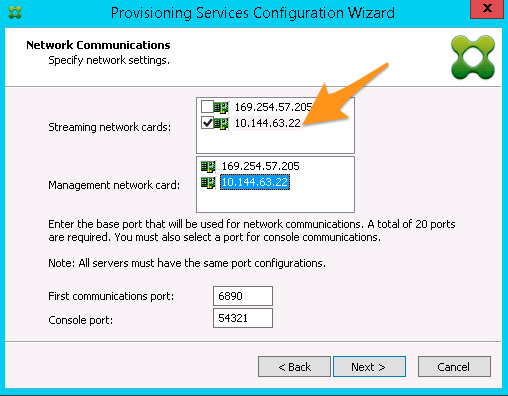
Enable TFTP service, so the machines can boot up from PVS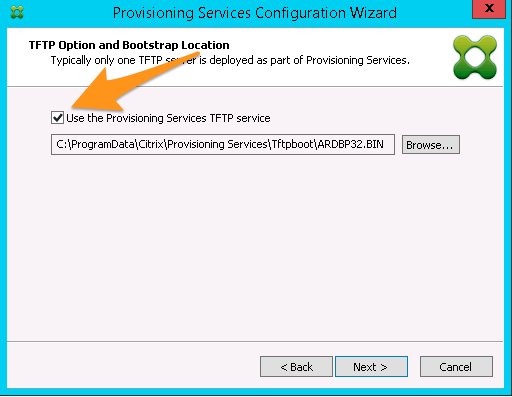
Do not change the default gateway, use wizard recommended settings 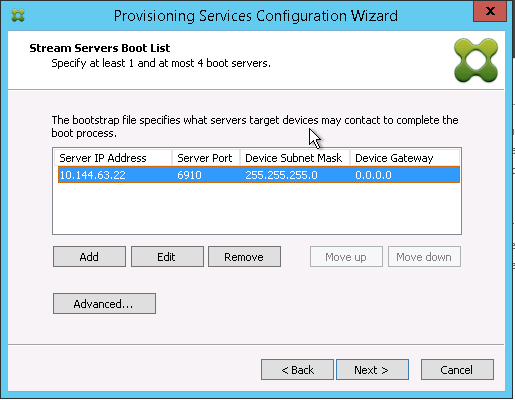
Wait for all green check marks and click on Done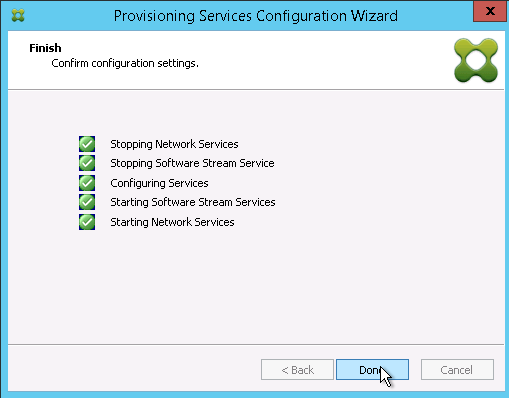
Additionally it is very important to configure the NIC order and provider order on the server. For this go to Networking Advanced Settings and make sure the active NICs and providers are at the top of the list. 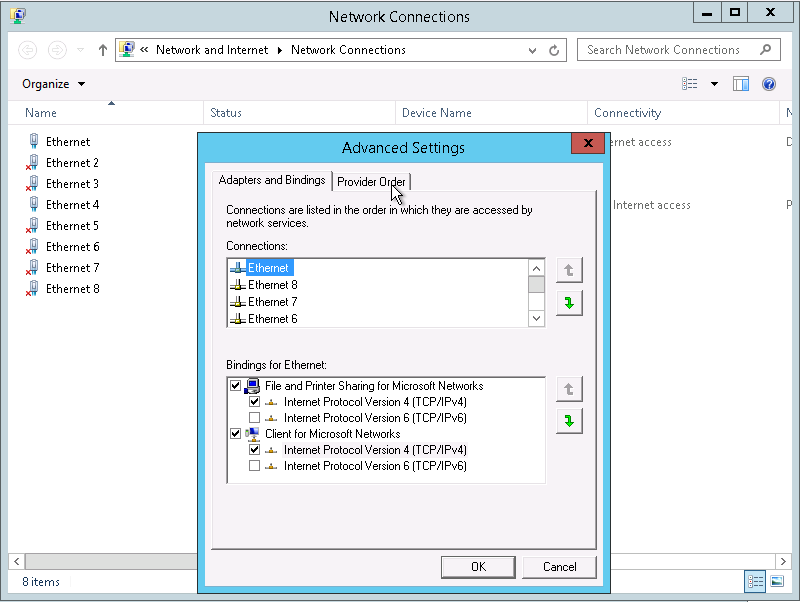
Installing PVS management Console
Interestingly enough, the new setup doesn’t install the management console. So this will need to be done. First select console installation. This is a very simple installation process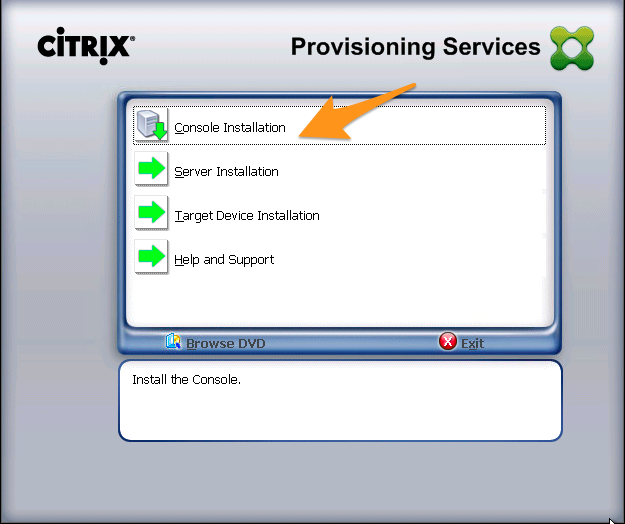
Click on Next at the Welcome screen
Accept the License
Select that this will be used by all users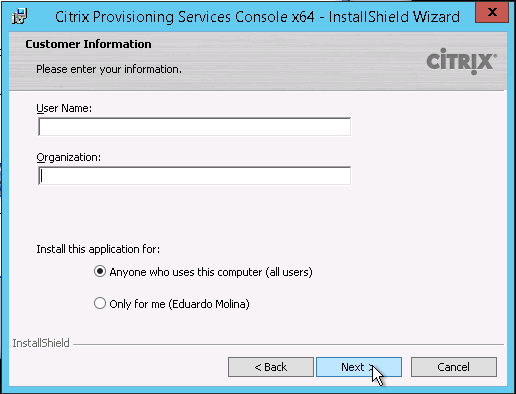
Define the folder where you want to install the console 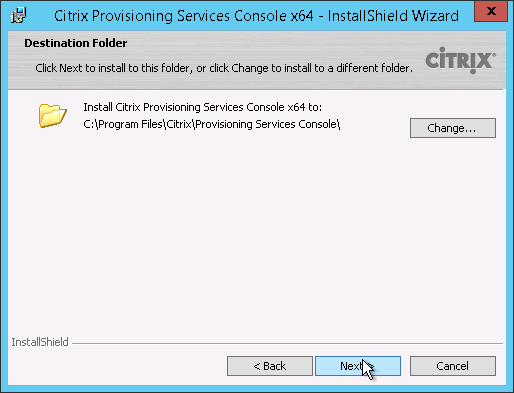
We selected the complete install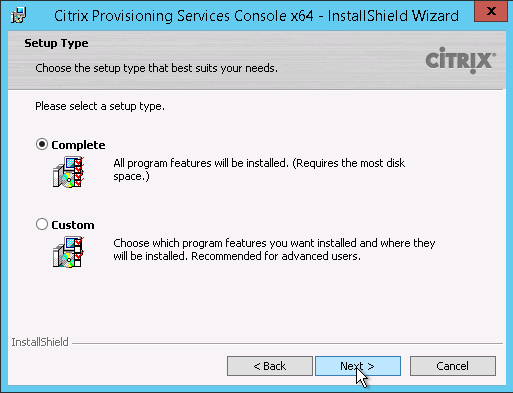
Click on Install
Click on Finish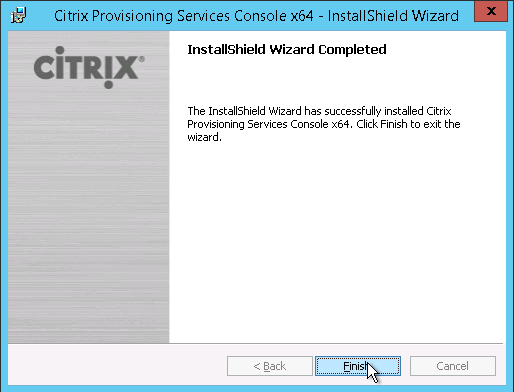
After the console has been installed, open the application and configure the connection to the newly created farm.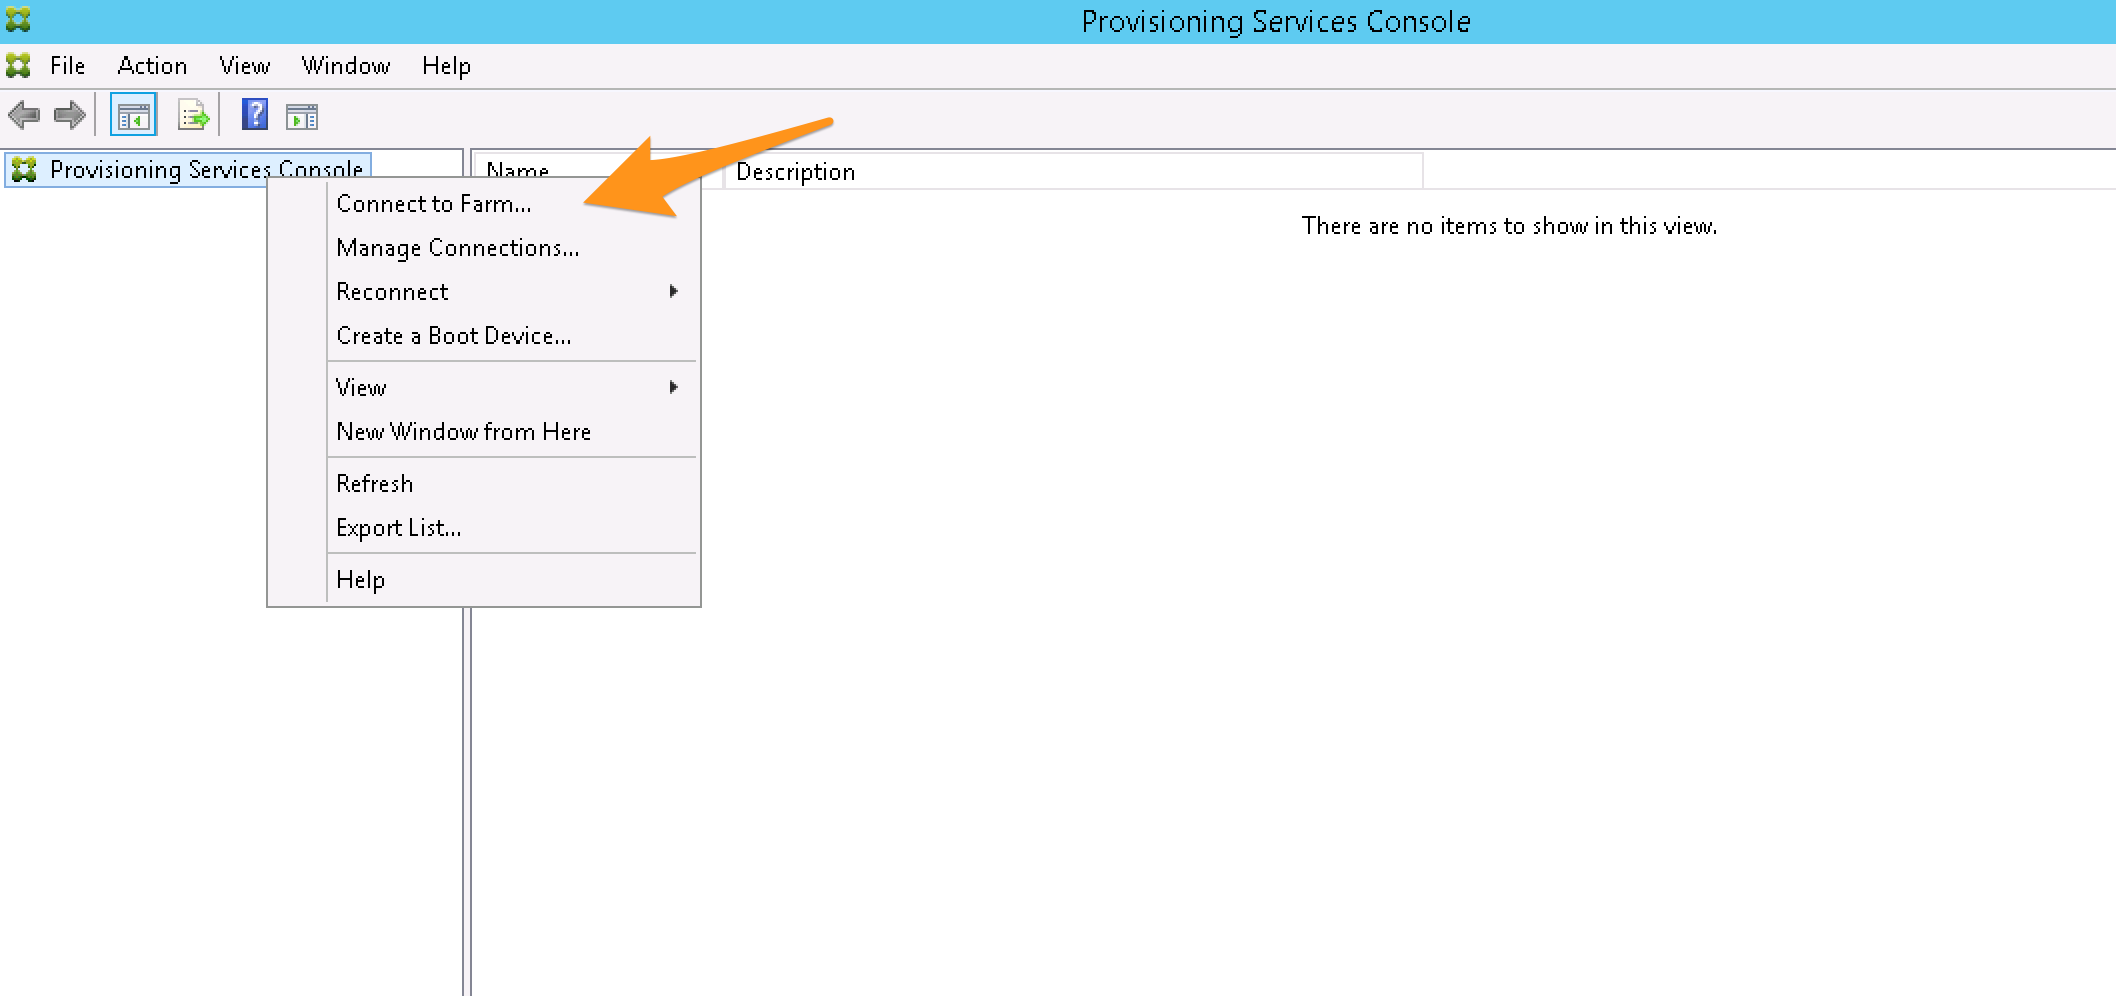
Enter the login information for the PVS server and click on Connect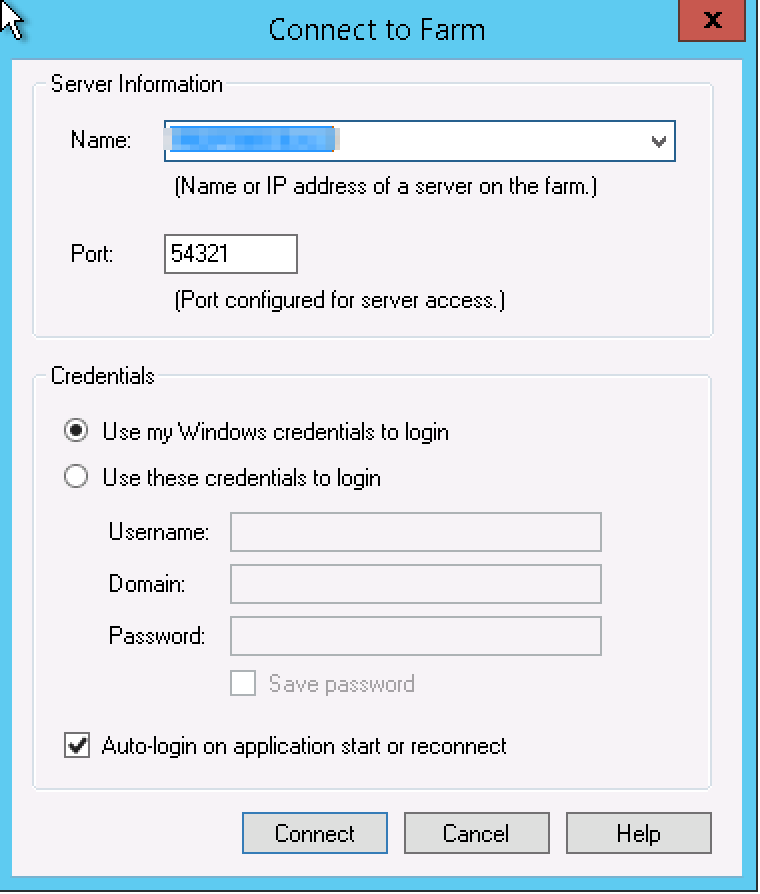
Start working on with your PVS environment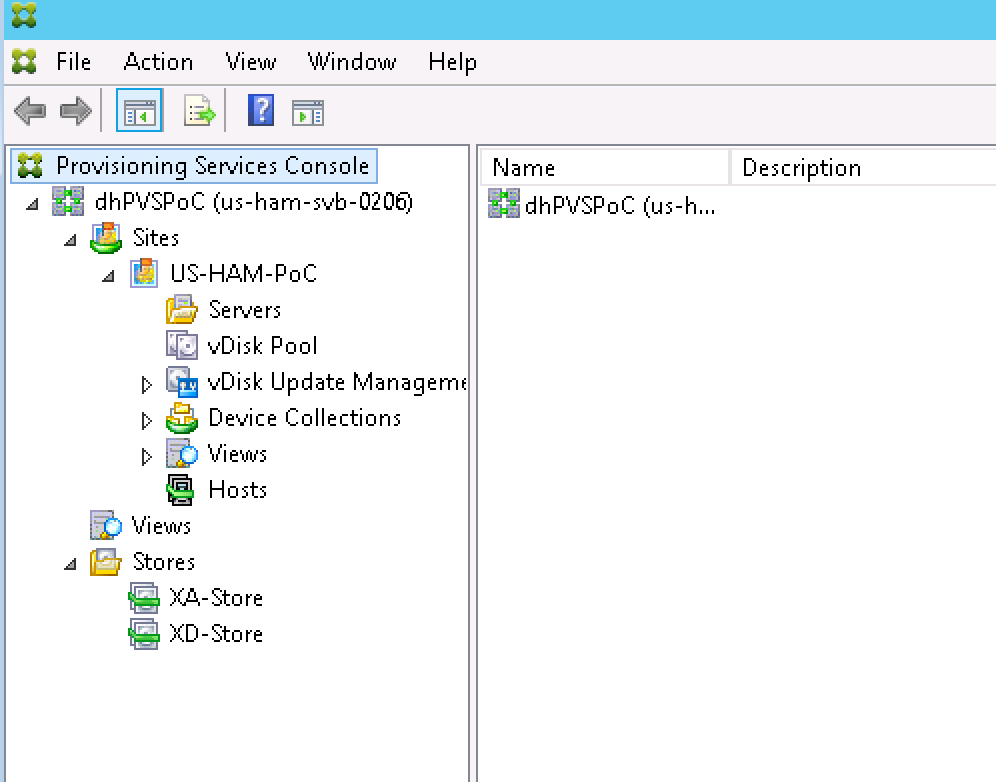
Have a happy provisioning.
Molikop
I have just finish updating this document with the right images, somehow they didn’t get loaded the right way. I’m really sorry about that